1.1 - User Onboarding
1.1.1 - Dashboard Log-in
Access the dashboard at 👉 app.mozaic.earth.
We use a secure, passwordless login system to keep your data safe without the hassle of complex password management.
Here's how to get in:
-
Enter your email address on the login page.
-
Check your inbox for a 6-digit passcode.
-
Enter the code, and you're in.
-
Click Accept invite to view your project.
💡 Pro Tip: No passcode showing up? Have a quick check of your junk or spam folder, it usually turns up there.
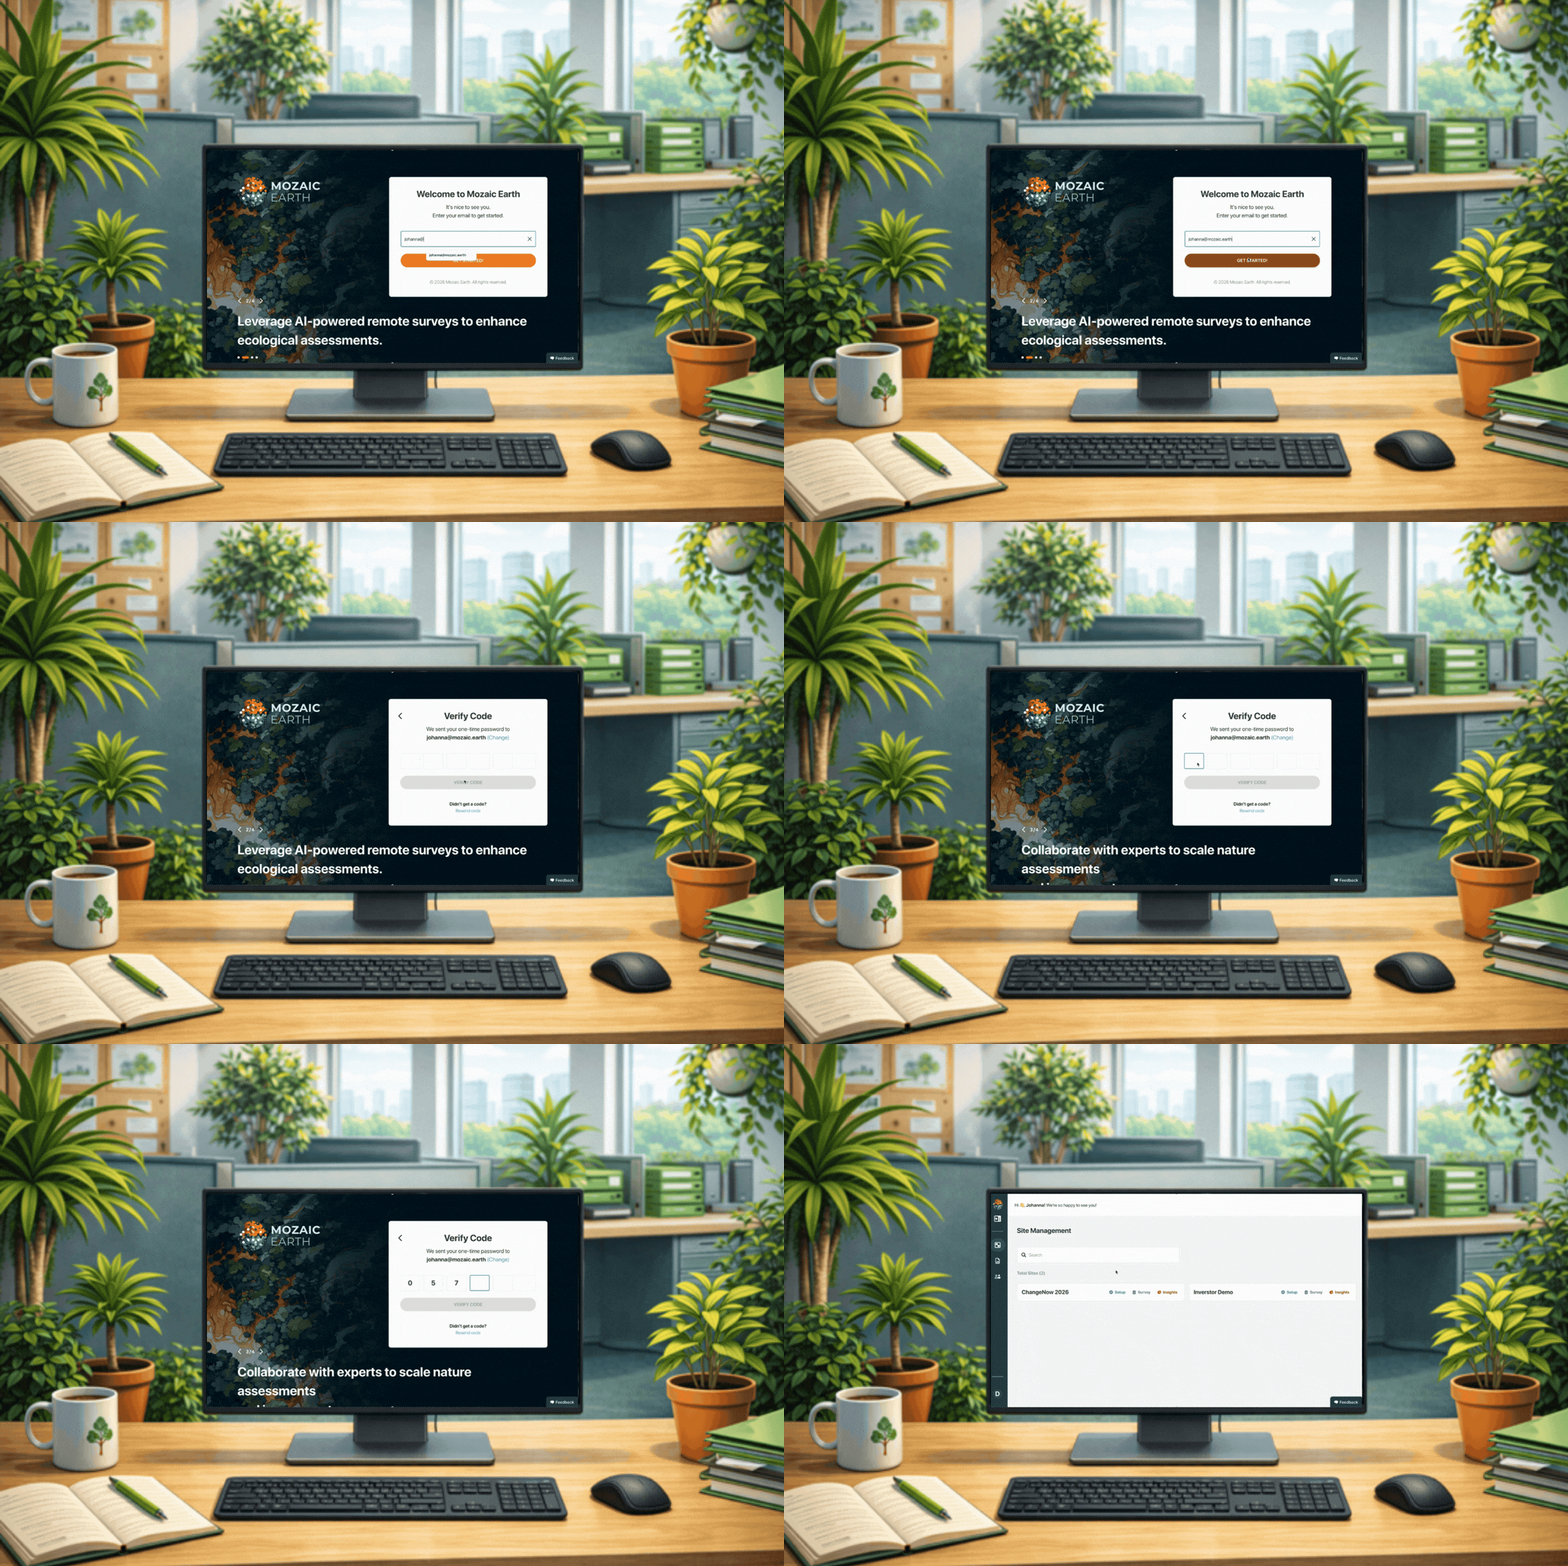
How to log into the platform
1.1.2 - User Management & Permissions
Growing your team is easy. Just head to the User management tab to invite colleagues and manage who can see what.
When you add someone, you can decide whether they see your whole organisation, or just specific sites:
-
Organisation-Level Access: This is the first page you'll land on in User management. Add someone here and they'll be able to see every site in your organisation. (What they can actually do on each site still comes down to the role you give them.)
-
Site-Level Access: Want to keep things more contained? You can manage permissions at site level instead. Someone added this way will only see the sites they've been invited to, for example two out of five, and won't be able to view or touch anything else in your organisation.
To add a new user:
-
Click + Invite user
-
Enter the user’s email address.
-
Choose the right permission level (see the table below).
-
Click Send Invitation
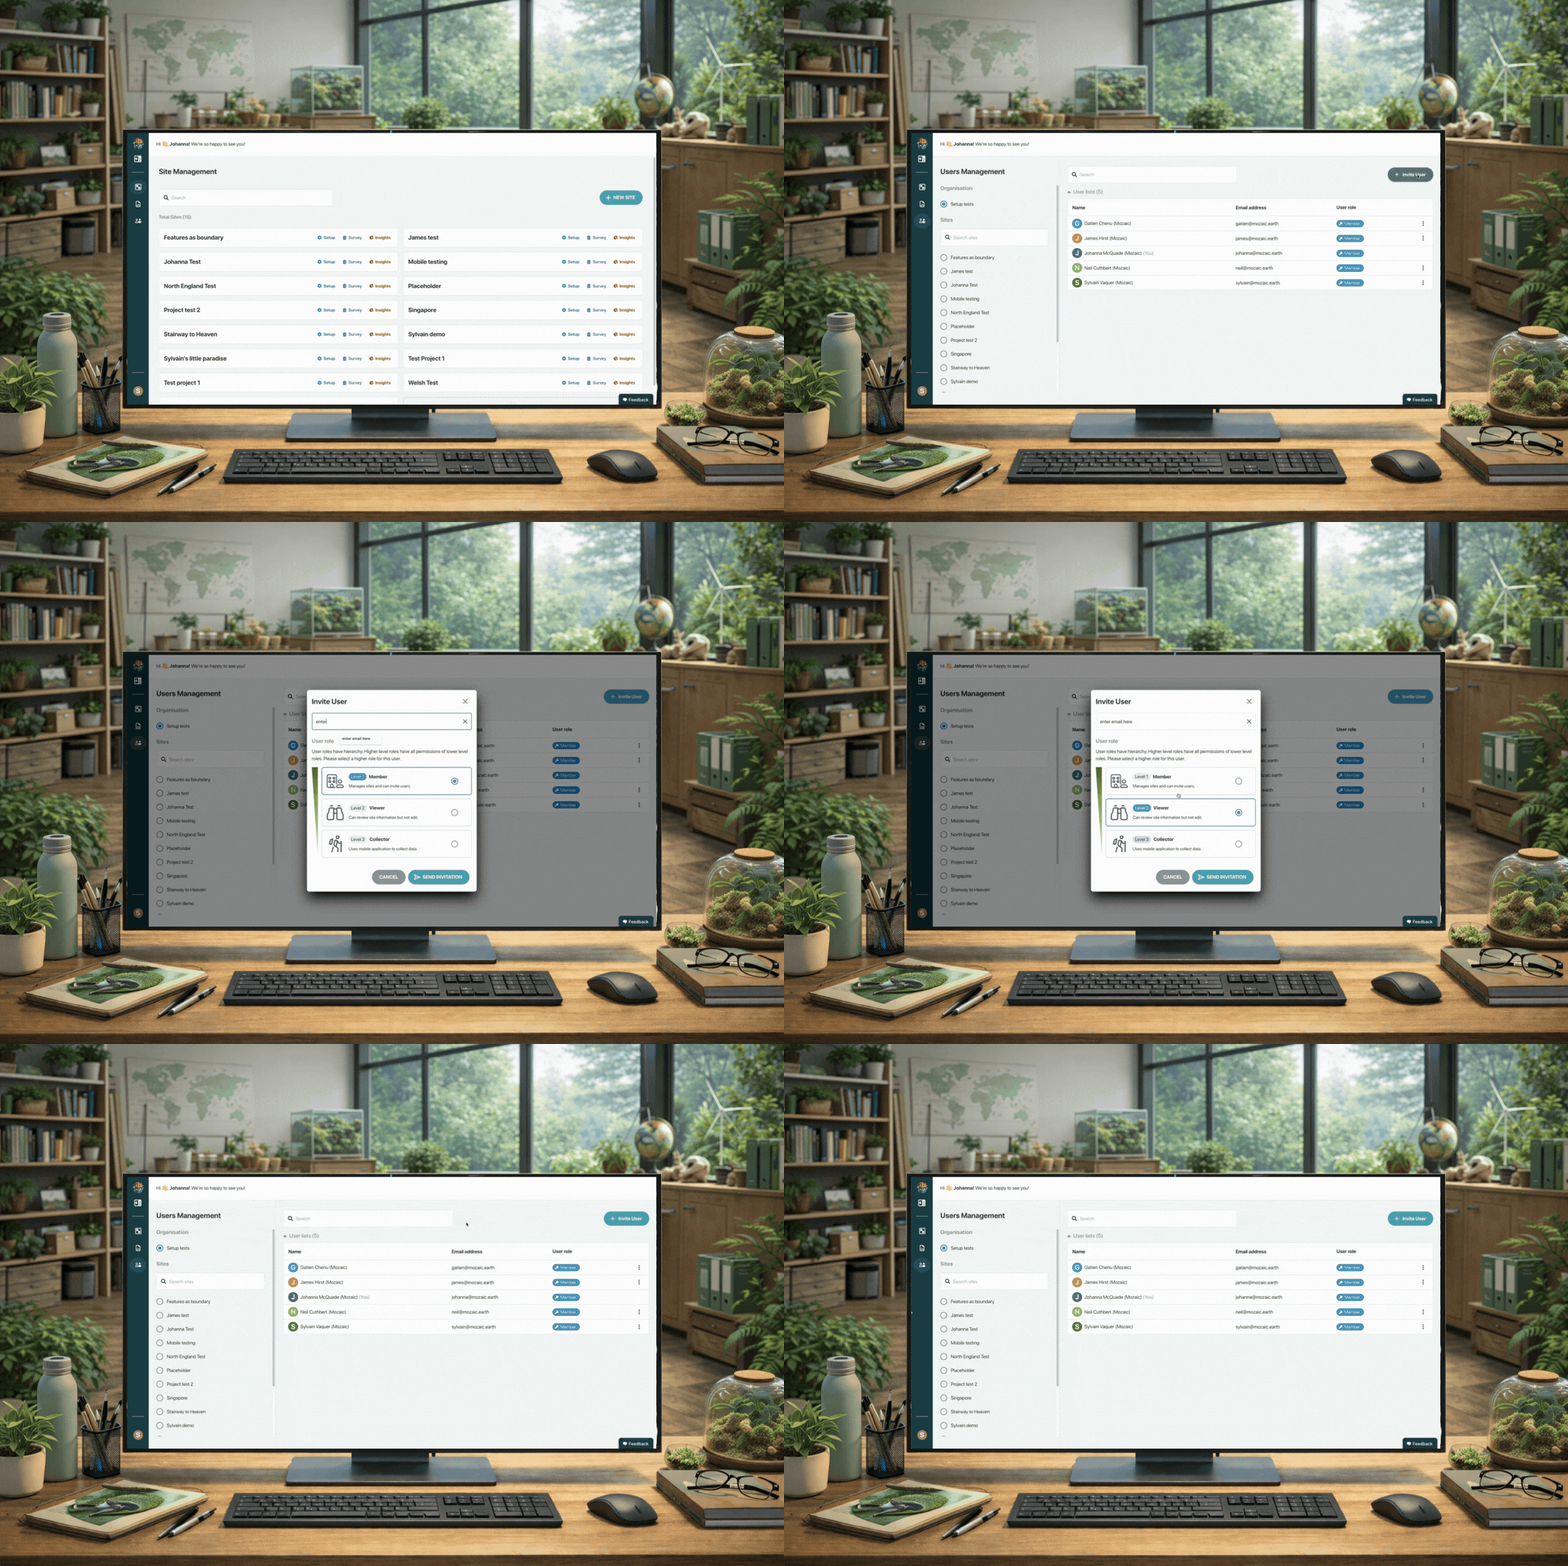
How to add your users and assign permission levels
User Roles & Permissions
Pick whichever role fits your team member best. One thing worth knowing: roles stack. Member (Level 1) can do everything Viewer and Collector can, and Viewer (Level 2) can do everything Collector can.
| Role | Permission | Best for: |
|---|---|---|
| Member | Full access to manage sites, data and reporting and invite additional users | Project Managers & Team leads |
| Viewer | Can review site information, but cannot edit or delete | Auditors / external reviewers |
| Collector | Uses the mobile app to collect data only | Data collectors / Field teams |
💡 Pro Tip: Got a big field team to bring on? Use the + Open invite button to generate a QR code, and collectors can scan it to join instantly, no waiting around for an email invite (mobile app only).
⚠️ Security Note: Handle with Care
Be selective when sharing Open Invitation codes. Anyone with access to the code can collect, upload, or amend data within the app.
-
Avoid posting these codes in public forums or sending them to large, unvetted groups to maintain the integrity of your ground-truth data.
-
If you prefer an extra layer of security, you can share the invitation code but choose to manually approve users before they are granted permission to view sensitive site data.
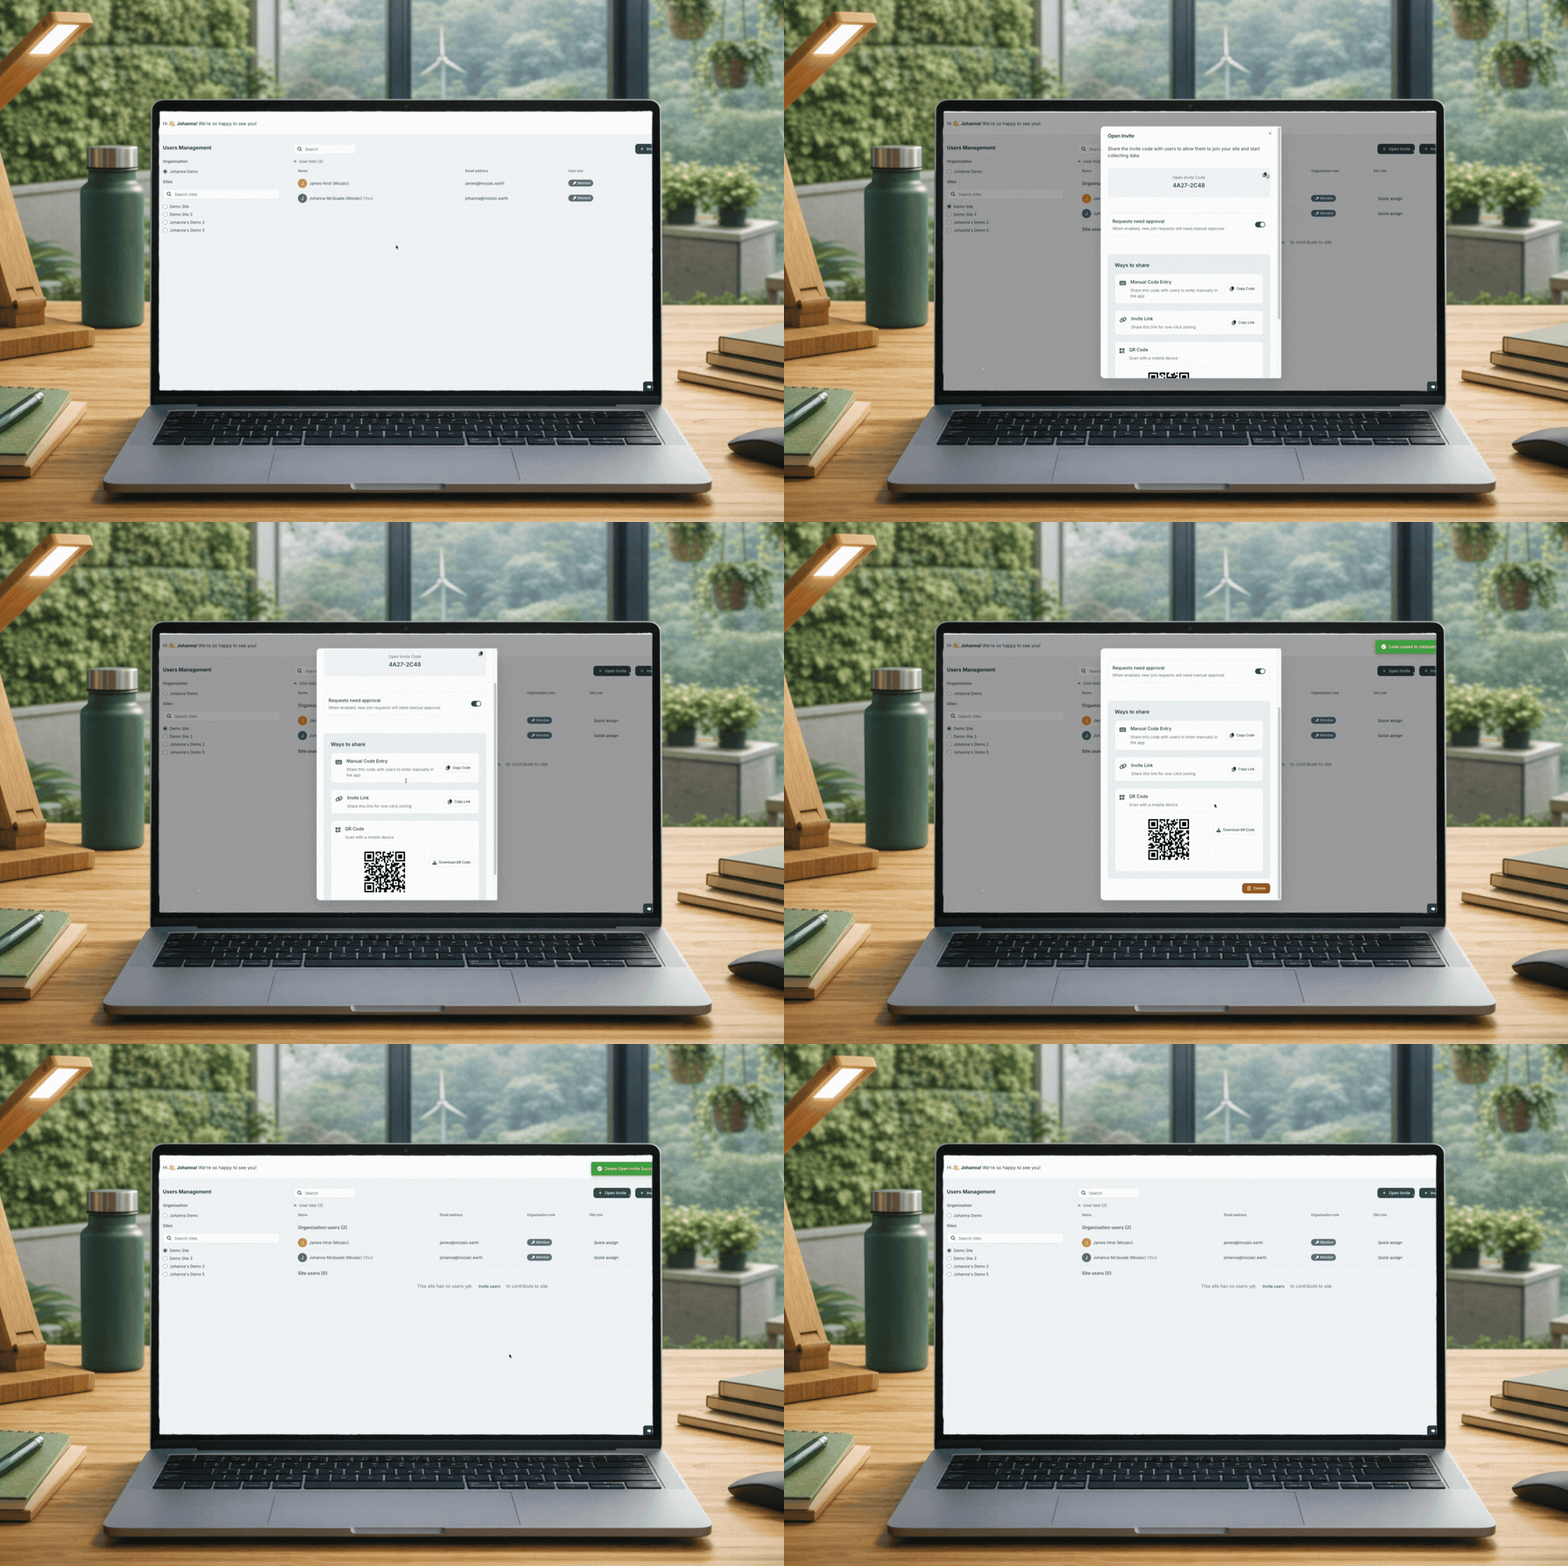
How to set up an open invite