1.3 - Set-up Plan
Think of a plan as your project's objective and timeframe, all in one place.
You can set up multiple plans for a single site to track different things, for example a BNG habitat assessment alongside a bioacoustics survey. Plans also let you split data out by year (like "Habitats 2026"), so you can track how things change over time.
1.3.1 - Create a Plan
-
Select your Site and click the Setup icon on the site management page.
-
Click "Create new plan."
-
Name your plan (e.g. Habitat Survey 2026)
-
Pick a Family from the dropdown: think of this as the broad framework you're working within (BNG, for example).
-
Then choose the specific framework within that family (for example, BNG Statutory Biodiversity Metric). Don't worry: you're not locked in, you can switch to a different metric later if your needs change.
-
Click Create, and you're all set.
1.3.2 - Defining Your Features
Features are your "map layers", things like plant plots, habitat polygons, or hedgerows, and they inform your ground truth sampling strategy and give the ecologist a good starting point during analysis.
You've got three ways to add them:
Method A: Upload an existing file
To do this:
1. Click Upload in the toolbar at the bottom of the map, then select Features.
2. Select your zipped shapefile or GeoJSON.
3. Check it looks correct on the map.
4. Click Upload.
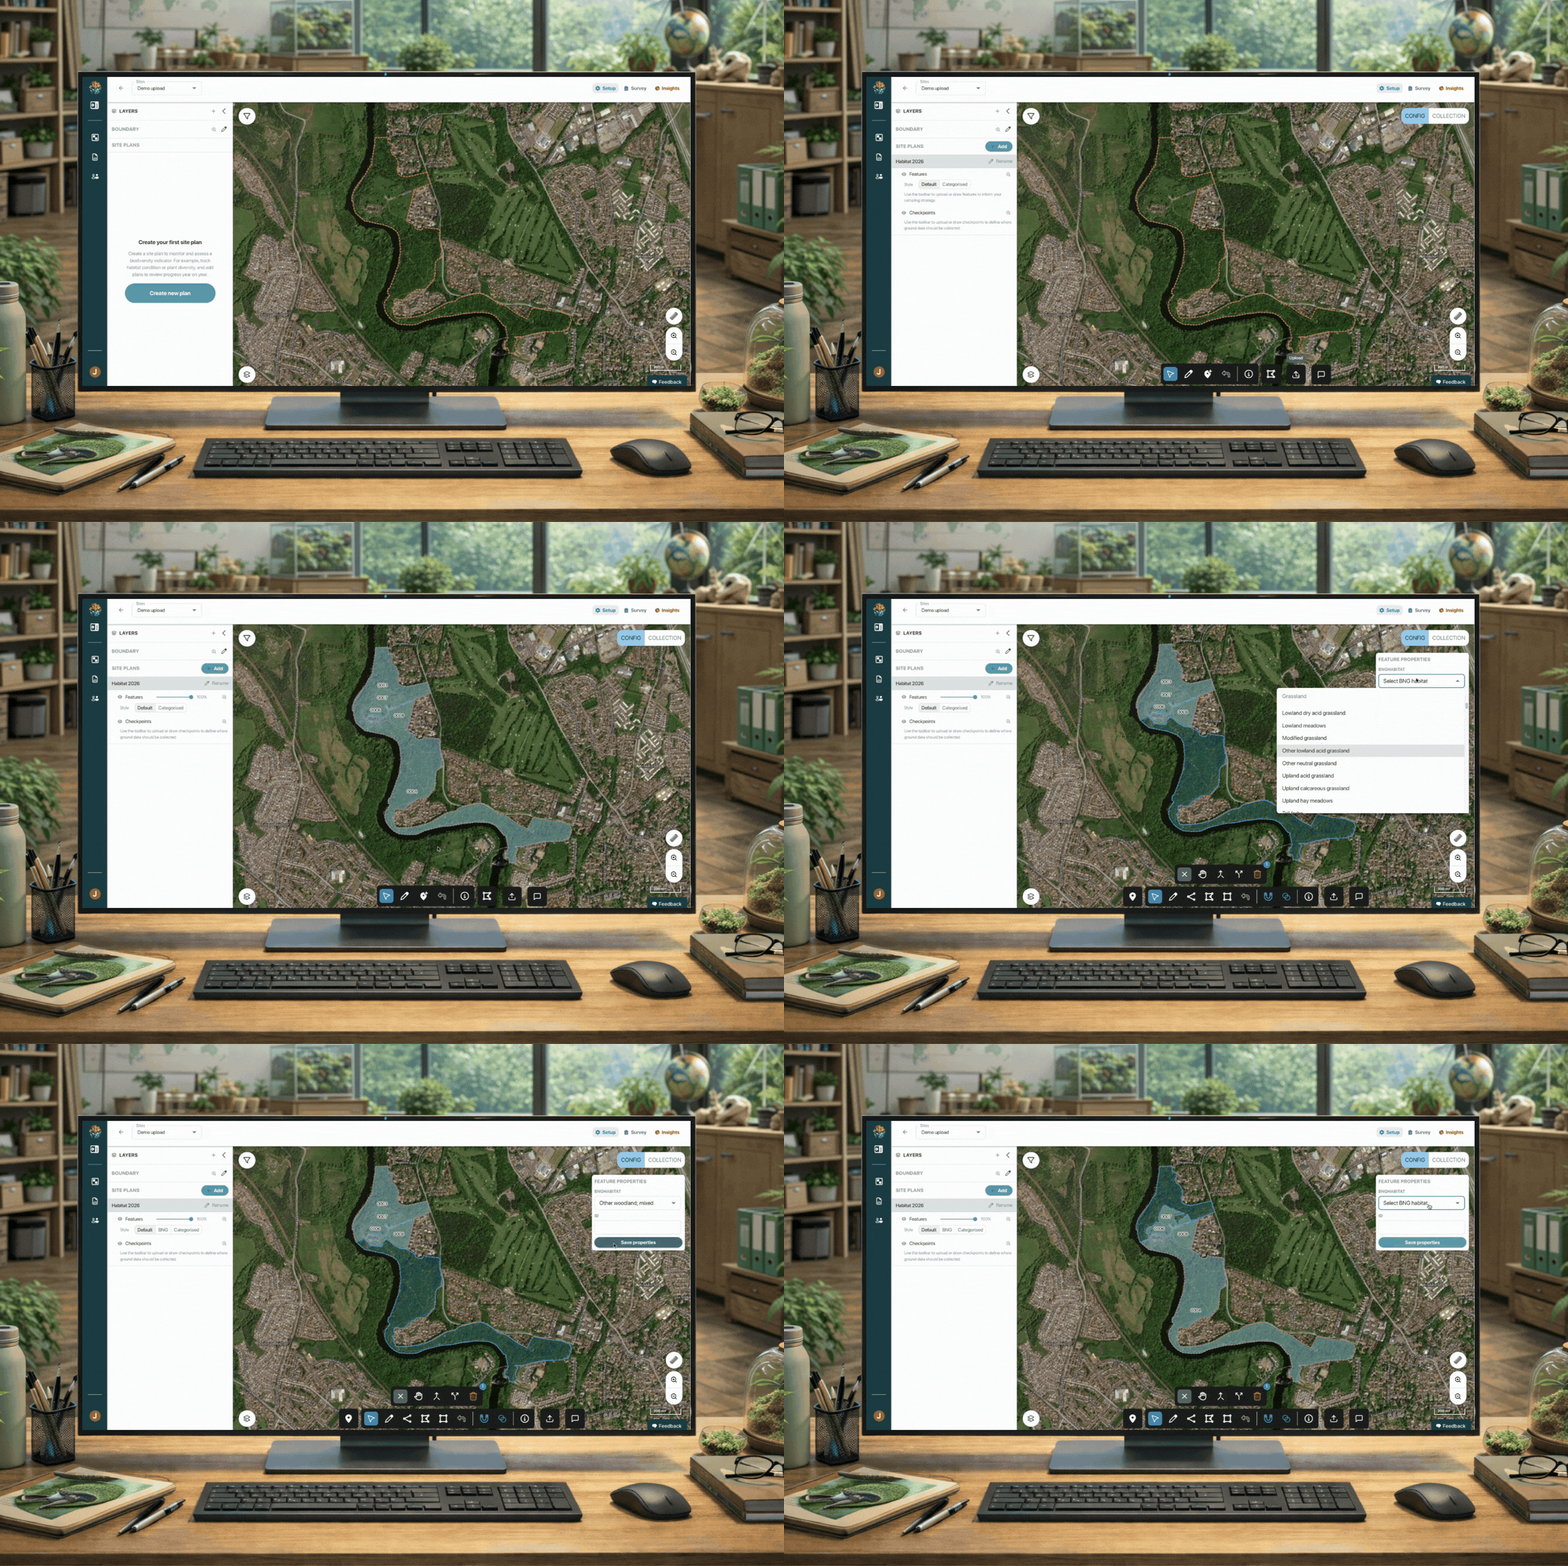
How to create a plan, upload features and assign properties
Method B: Draw your features directly in Mozaic OS
To do this:
1. Select "Interact with map features" in the toolbar.
2. Select the draw polygon icon and start drawing your first habitat on the map.
3. Once you're happy with the polygon, assign a habitat classification: select the feature, then choose values from the dropdown in the pop-up on the right-hand side.
4. Keep drawing until you've completed your site's habitat map.
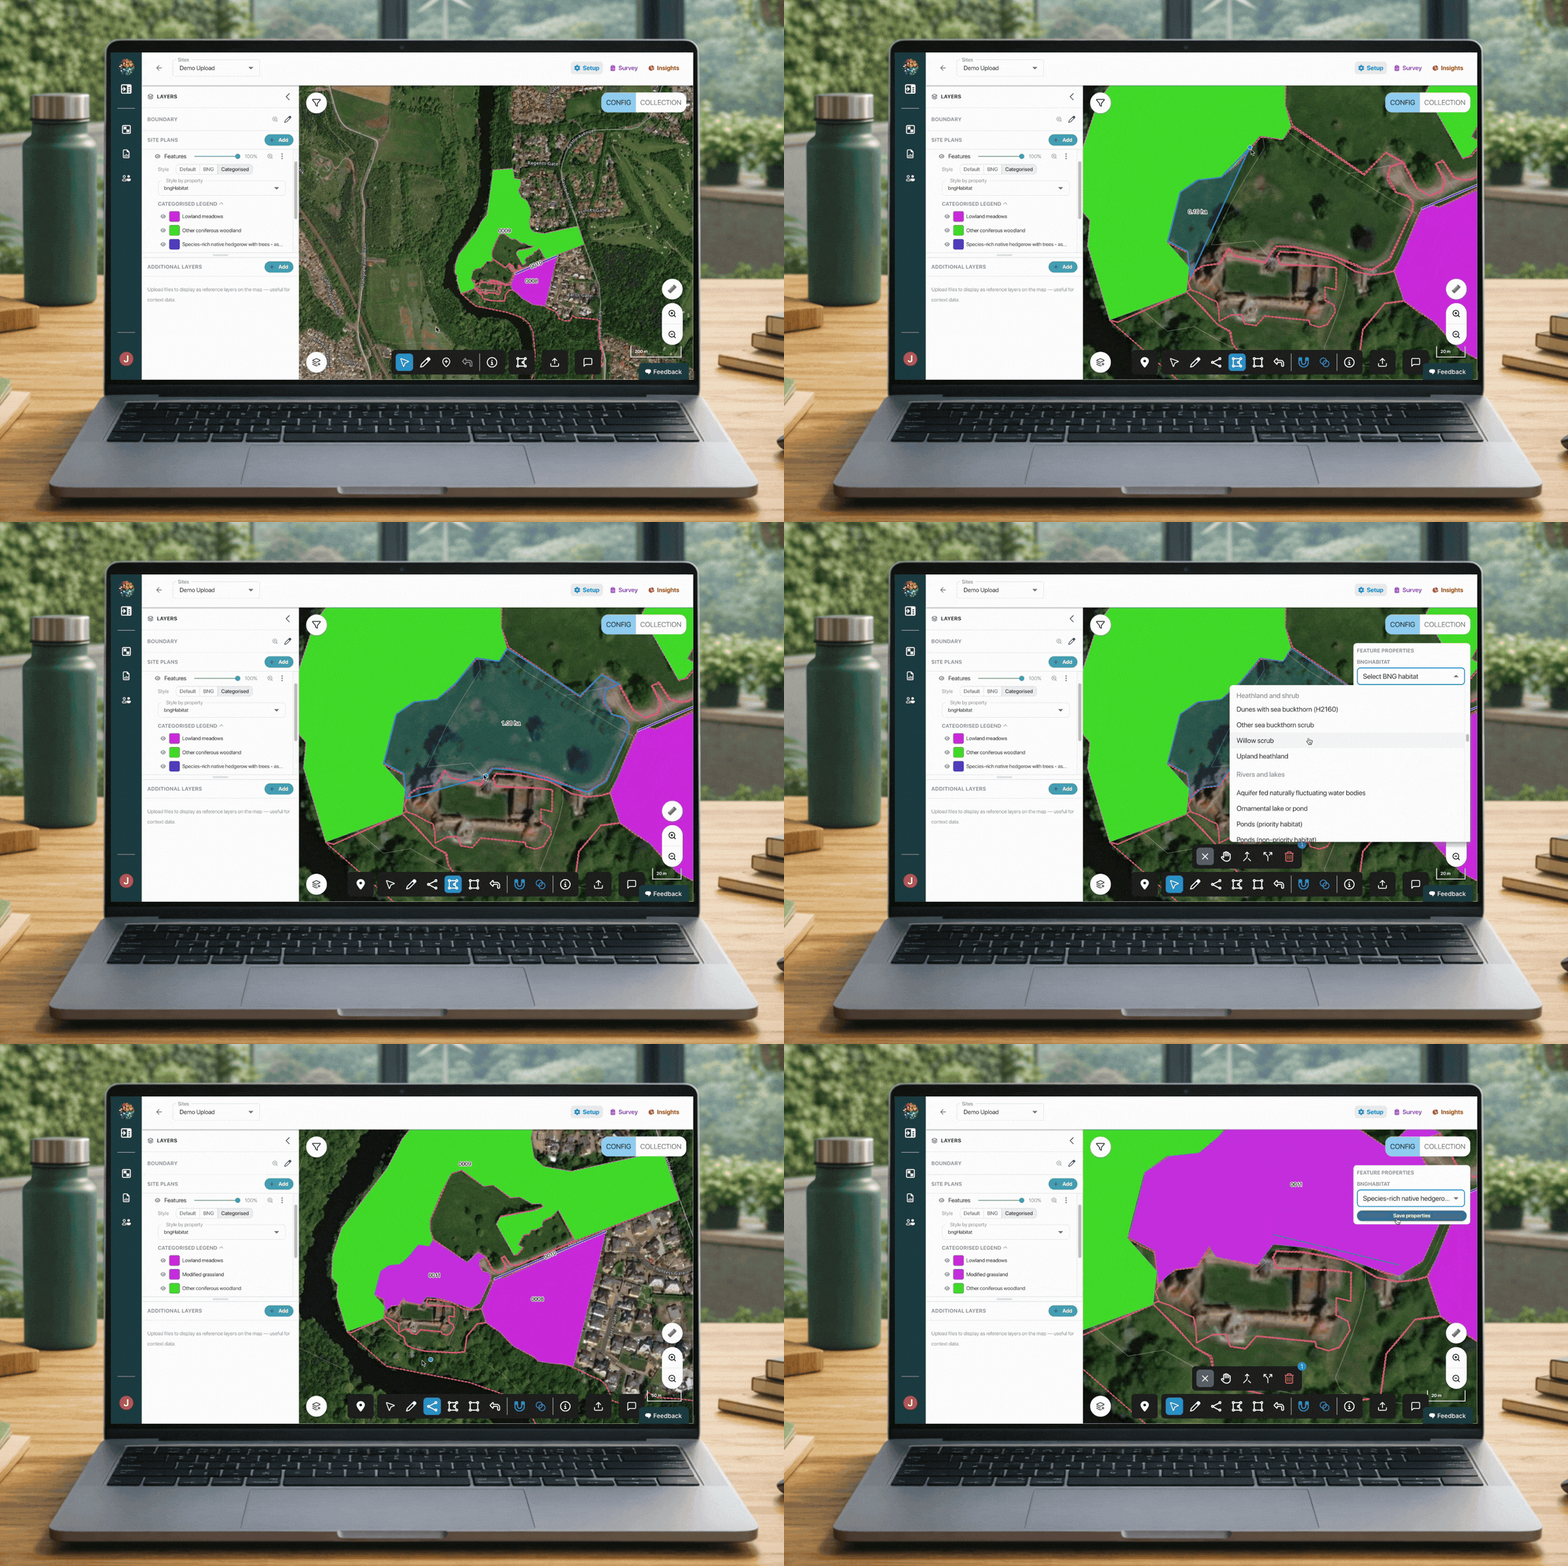
Method C: Generate on request
Mozaic Earth can automatically generate your habitat map using AI. Just email johanna@mozaic.earth to explore this option.
1.3.3 - Advanced Editing Tools
Mozaic OS comes with built-in map editing tools, so your data stays precise and ready for ecologist review from day one. Once your features are on the map, these tools let you fine-tune them however you need.
Want to dig deeper?
-
Click the map-tools info icon
 on the toolbar at the bottom of the screen.
 -
Check out the full guide in the map editing tools section: https://resources.mozaic.earth/docs/tips-and-tricks/5.1---map-editing-tools
1.3.4 - Context layers
You can add context layers to help set up features or get a better sense of what you're sampling. Common examples include topography or previous survey data.
Here's how to add:
-
Click the + Add icon next to Additional layers.
-
Upload your file.
Need something more specific? Drop us a line at johanna@mozaic.earth and we'll see what we can do.