1.5 - Going live to the app
Your sampling strategy is designed; now it’s time to make it live! This step pushes your sampling plan from the dashboard to the Mozaic Earth Mobile App, so your field team can see their checkpoints and get started.
1.5.1 - Activate Checkpoints
-
Toggle on the Collection tab located at the top of the map.
-
Select the plan you want to make live (e.g., Habitats 2026).
-
You can activate the whole plan in one go, or break it into smaller sections with their own collection periods.
-
Select the checkpoints you want to activate
-
Select all: Ctrl+A selects every checkpoint.
-
Box select: Hold Ctrl and drag a box around a specific group of points.
-
Manual Select: Hold shift and click on the checkpoints you want to select
-
-
Click “Activate” in the bottom toolbar.
-
Click “+ Add period”
-
In the pop-up window, name your sampling period and pick your dates. Getting the timing right really matters here:
| Survey type | Survey frequency (per year) | Optimal Months | Why? |
|---|---|---|---|
| Habitat | 1x | April - October | Best to identify indicator plants for BNG |
| Plants | 2x (1 month between collections) | April - September | Most species in full flowering and easier for ecologist to ID |
| Bioacoustics | 1x (30 day period) | April - July | Peak bird breeding and singing season |
| Invertebrates | 2x (5 day period + 1 month between surveys) | April - September | Max activity for pollinators and terrestrial insects |
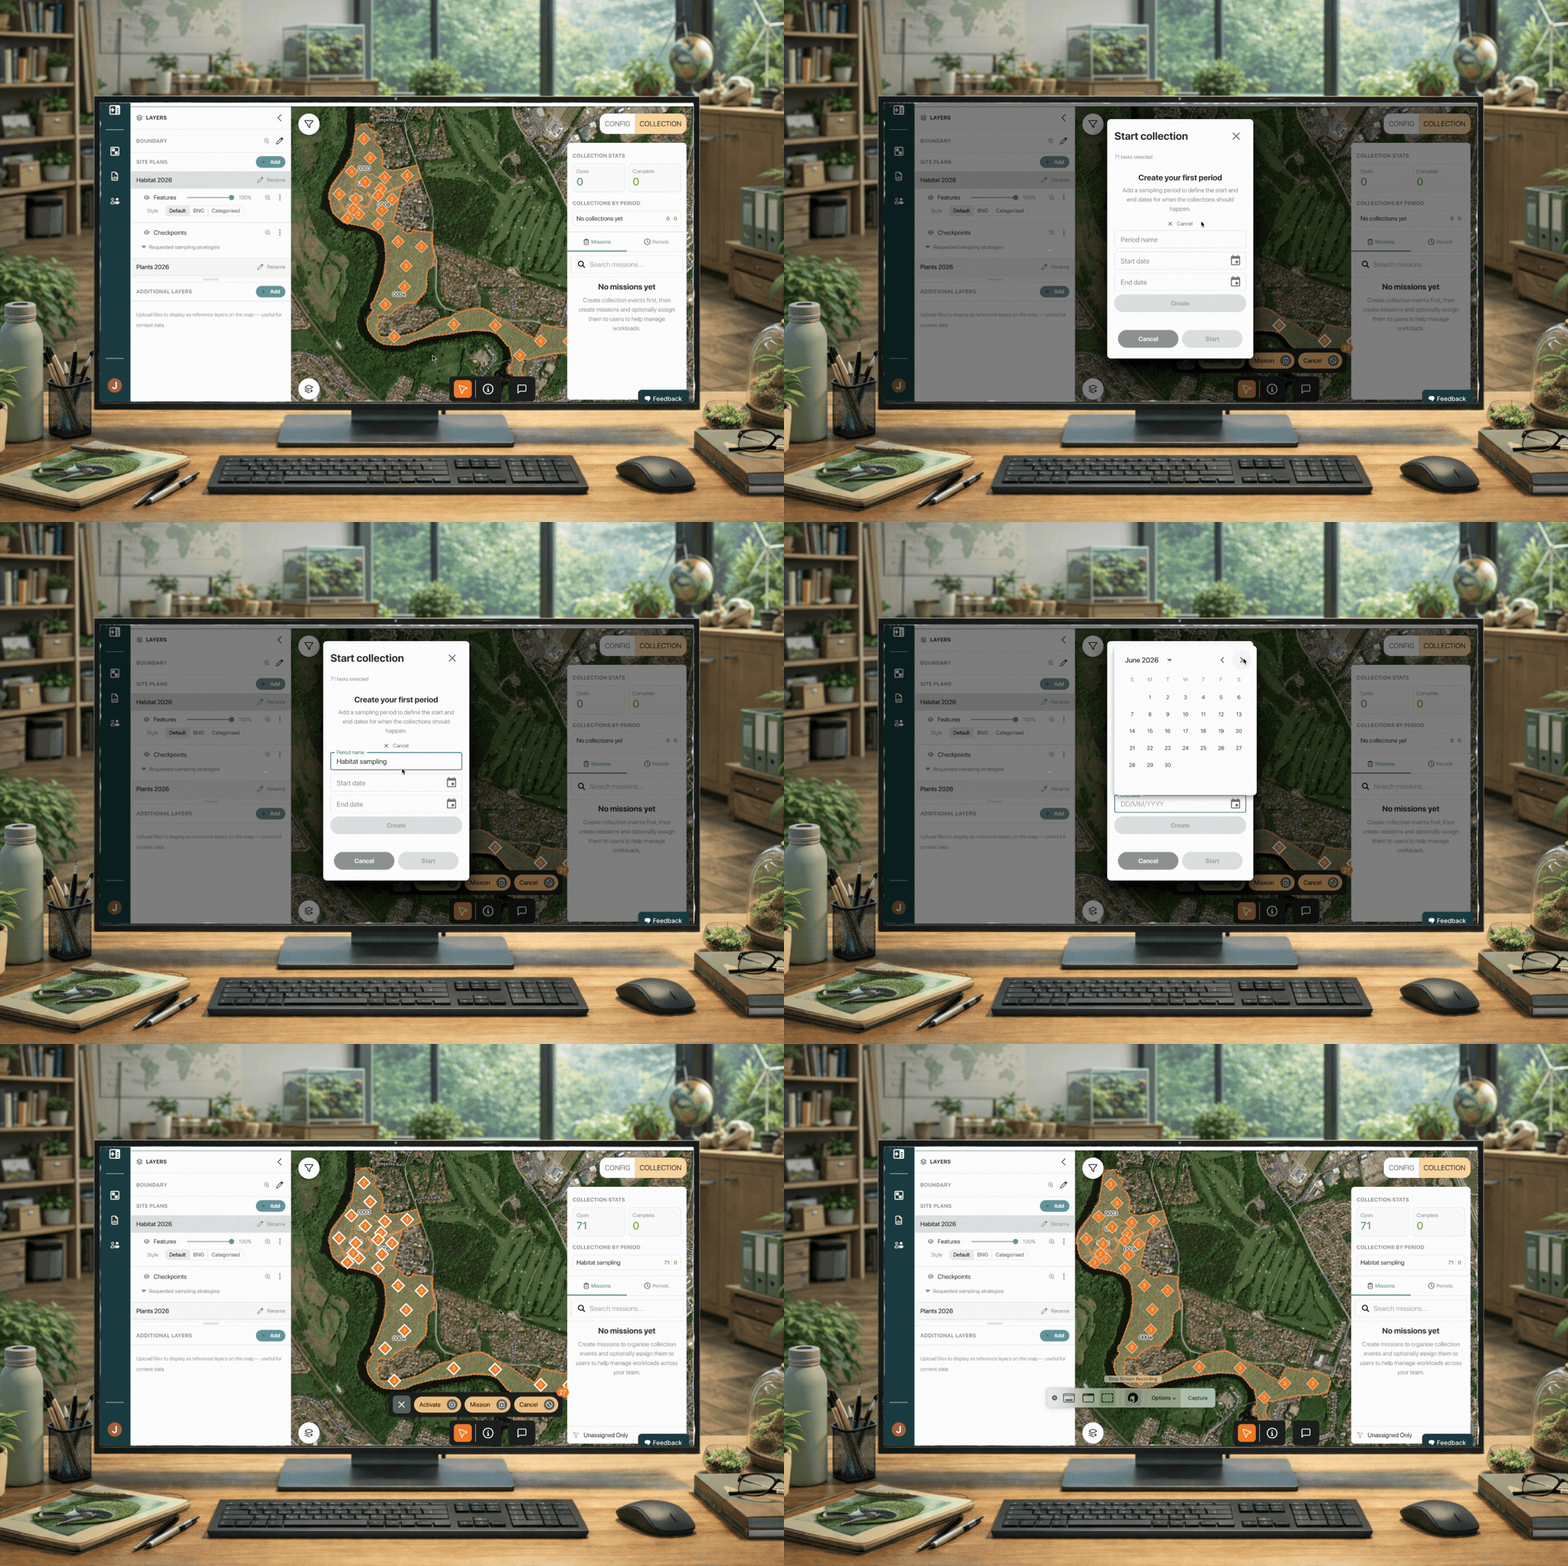
How to activate checkpoints
1.5.2 - Creating Missions
Missions are how you project-manage your field team's workload from within the app. Group checkpoints together by area or plan, then assign them as a mission, either left open for anyone to pick up, or assigned to a specific collector.
-
Highlight the points you want to group together as a mission.
-
Click "Mission" in the bottom toolbar.
-
Click "Add Mission"
-
Create a name and set the dates it should be completed within.
-
Choose User:
-
No user assigned: Everyone can see and pick it up.
-
Specific: Pick a collector from the dropdown to assign the work directly to them
-
Just a heads up: a collector's name will only show up in this dropdown once they've accepted their invite and set up their Mozaic Earth account. Haven't added them yet? No problem, you can invite them right from here: click + Invite user to this site, pop in their email, and assign their access. Just note - this gives them access to this site only, not the wider organisation.
-
-
Click create mission
💡 Pro Tip: Use keyboard shortcuts to allow you to multiselect checkpoints to activate or add assignments. Ctrl + A (Select All), Ctrl + Drag (Area Select), or Ctrl + Click (Multi-Select).
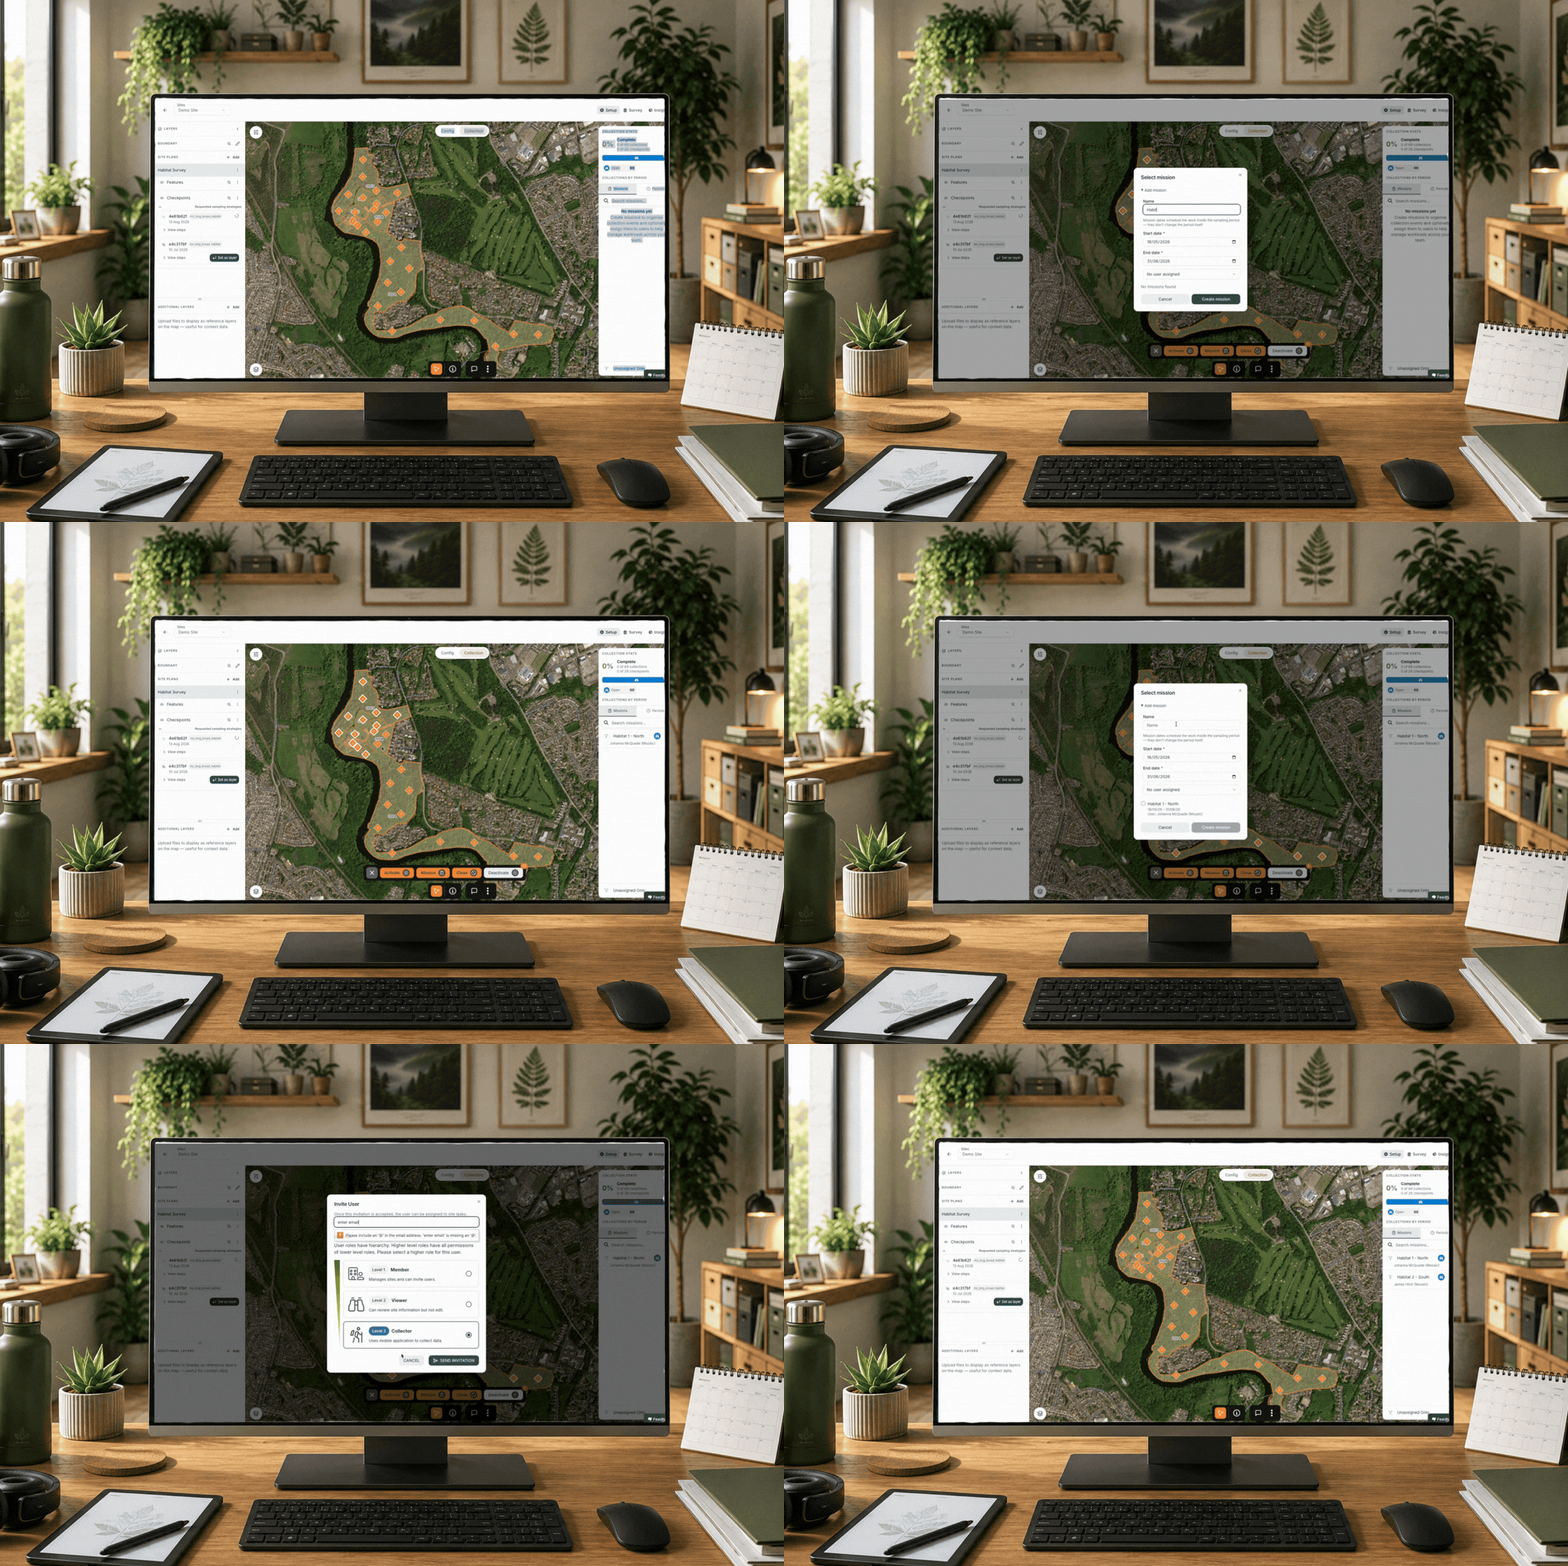
How to create a mission and assign a data collector
1.5.3 - Final Checklist
-
Plan Activated: Points are live in the collection stats and visible on the app.
-
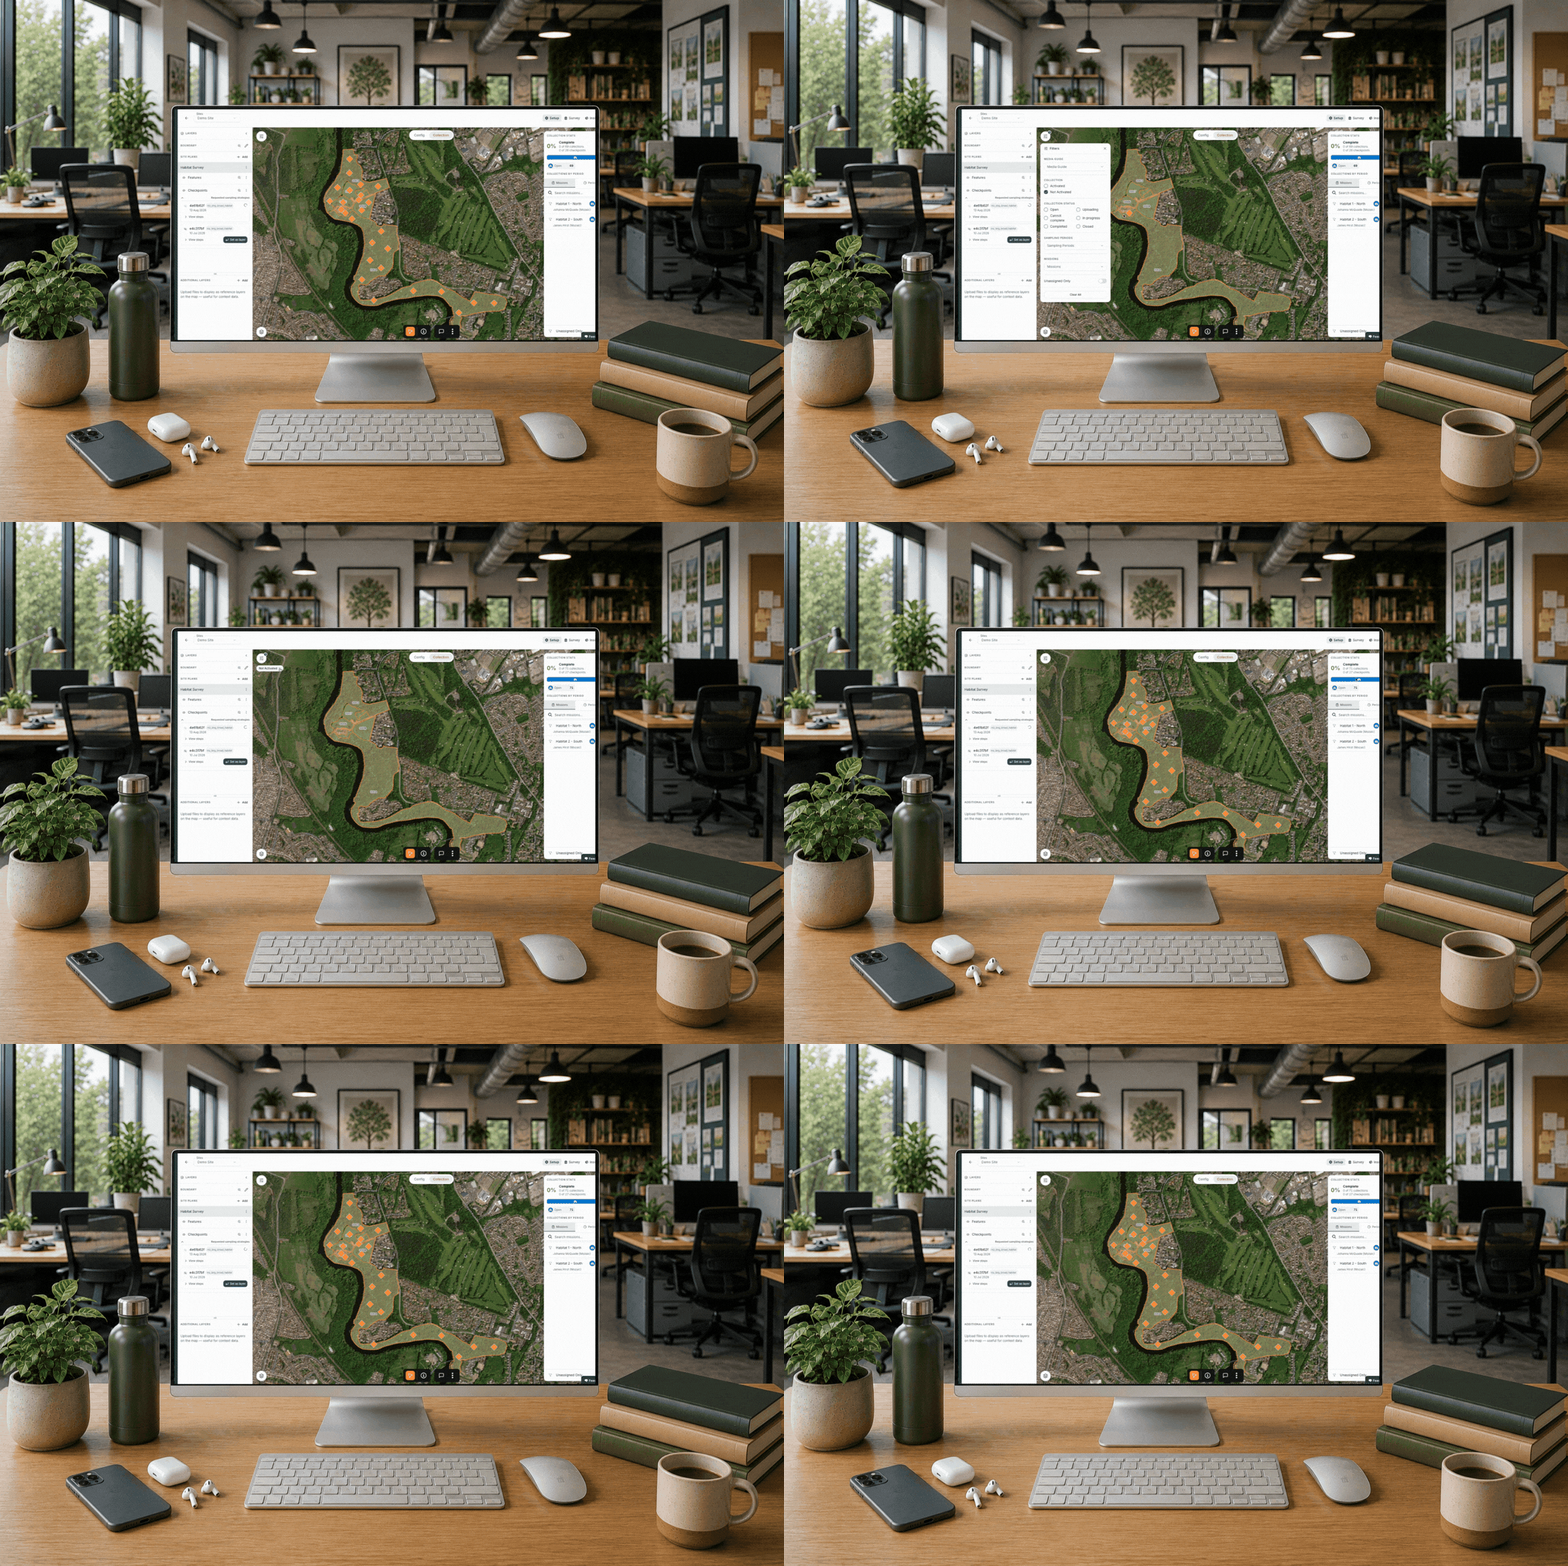
Verified: Give it a quick double-check using the filter button. Click the filter icon in the top-left of the screen, filter by Activated to see everything that's live, or Not activated to catch anything that hasn't gone through yet.
-
Users Onboarded: Collectors are added via User Management (Role: Collector).
-
Missions created (optional)
-
That's it, you're all set up and ready to start collecting real ground truth data.