1.2 - Set-up Site / Asset
1.2.1 - How to Create a New Site:
-
Navigate to the Site Management page
-
Click + NEW SITE
-
Give your site or asset a clear, recognisable name.
-
Set the boundary. You can do this two ways:
-
Upload a Boundary (geojson or zipped shapefile)
-
Draw a Boundary (Use the toolbar on the bottom of the pop up to trace your boundary directly on the map)
-
-
Ensure you are happy with your boundary: Uploaded or drawn, it doesn't matter, you can always use the editing toolbar to tweak your polygon until it looks right.
-
Save: Once satisfied, click Create at the bottom of the pop-up.
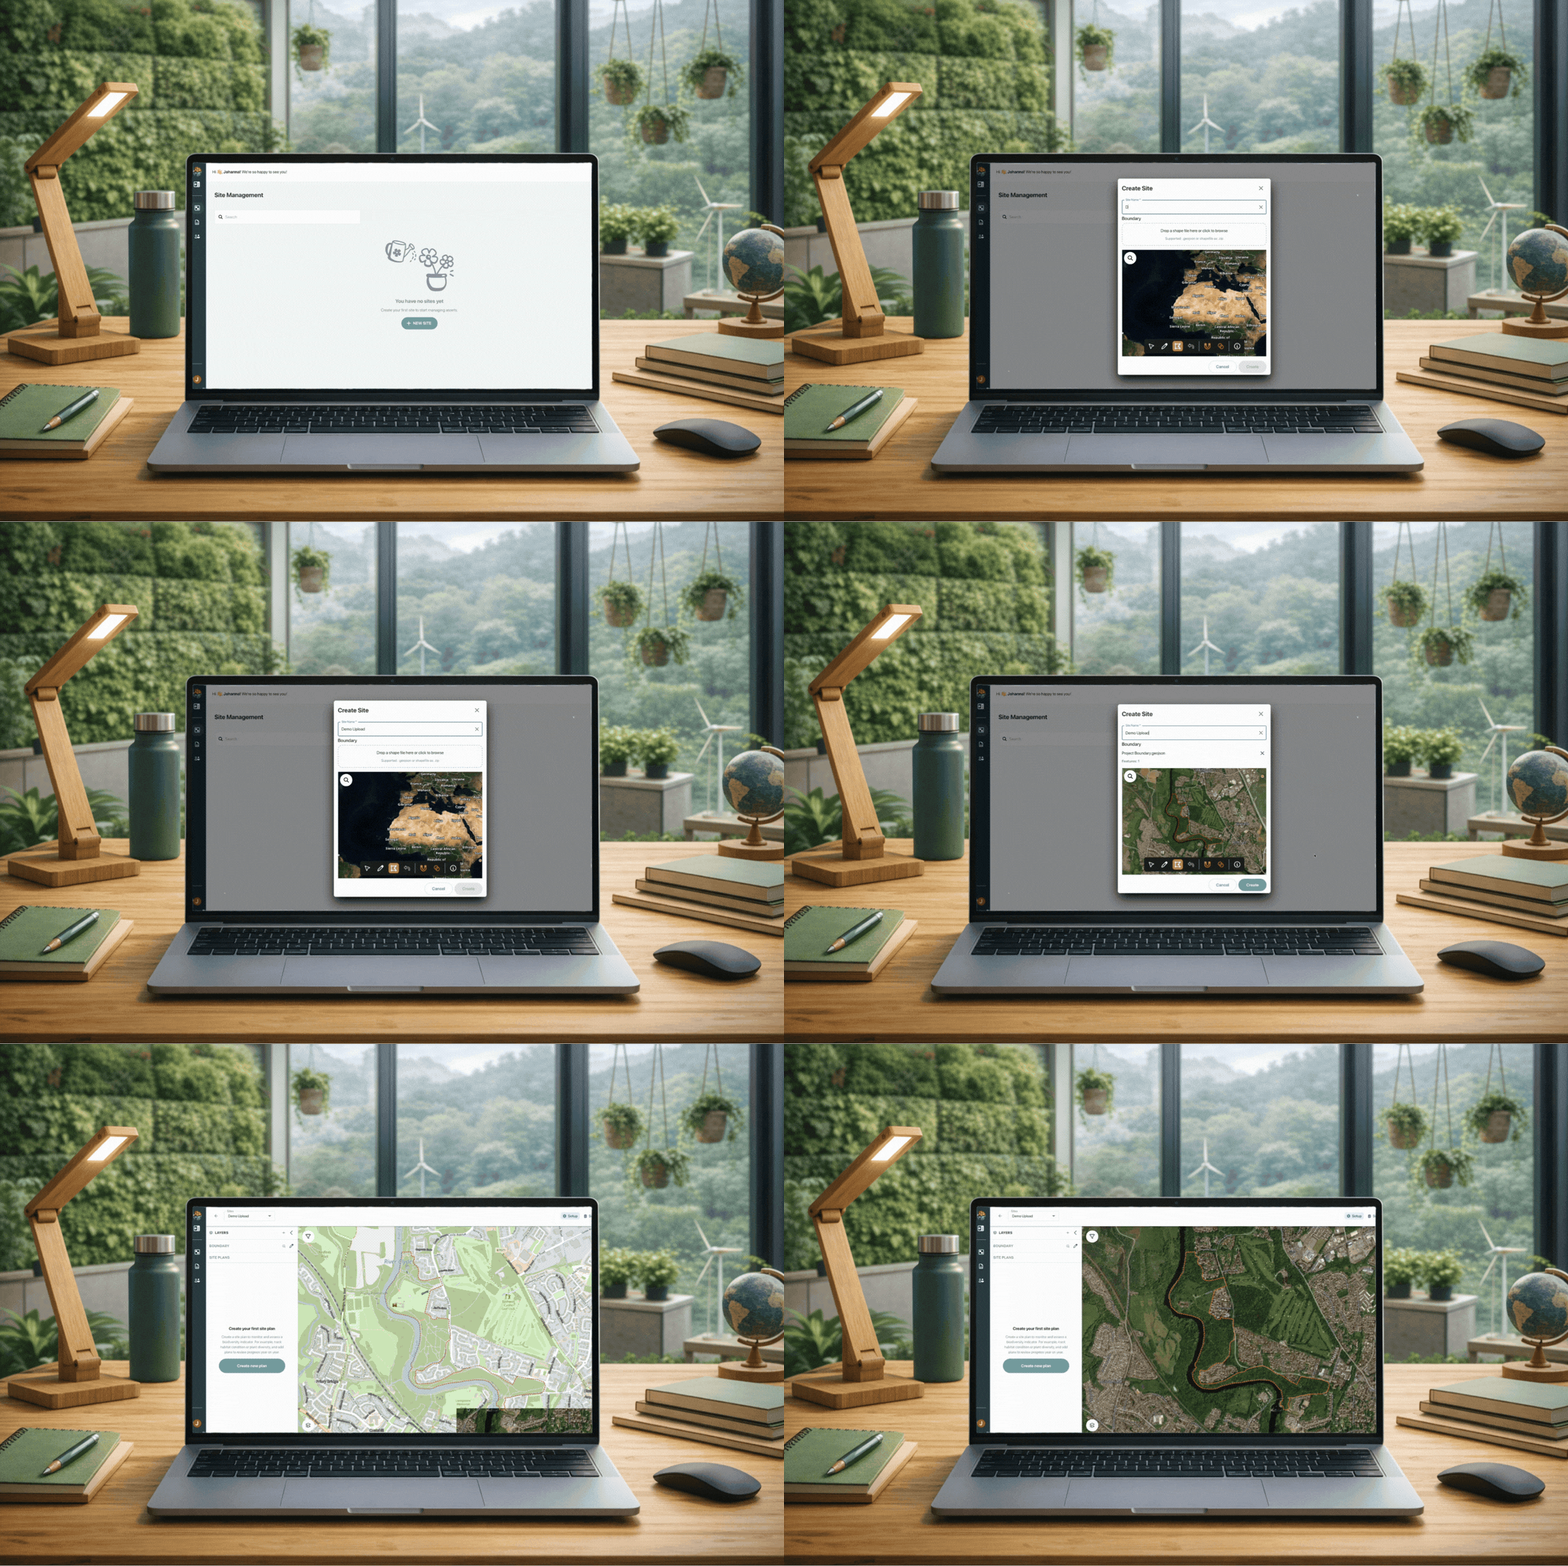
User creating a site and uploading their project boundary
1.2.2: Editing your boundary after it's been added
Don't stress about getting it perfect the first time. You can always come back and edit your site boundary later if your project scope shifts.
Here's how:
-
Click into the Setup page of Mozaic OS.
-
Next to Boundary in the left-hand menu, click the edit icon
- A red toolbar will appear, showing you're in boundary editing mode.
-
Choose how you'd like to edit:
-
Upload a new boundary: select and delete your old boundary, then click Upload to add your new boundary file.
-
Edit it directly on the map: use the tools in the toolbar to select the boundary, then click Edit to drag and move it into place.
-
-
Once you're happy with your boundary, turn boundary editing off using the edit
icon.
Not sure what a tool does?
-
Click the info icon

-
see the full guide to the map editing tools: https://resources.mozaic.earth/docs/tips-and-tricks/5.1---map-editing-tools
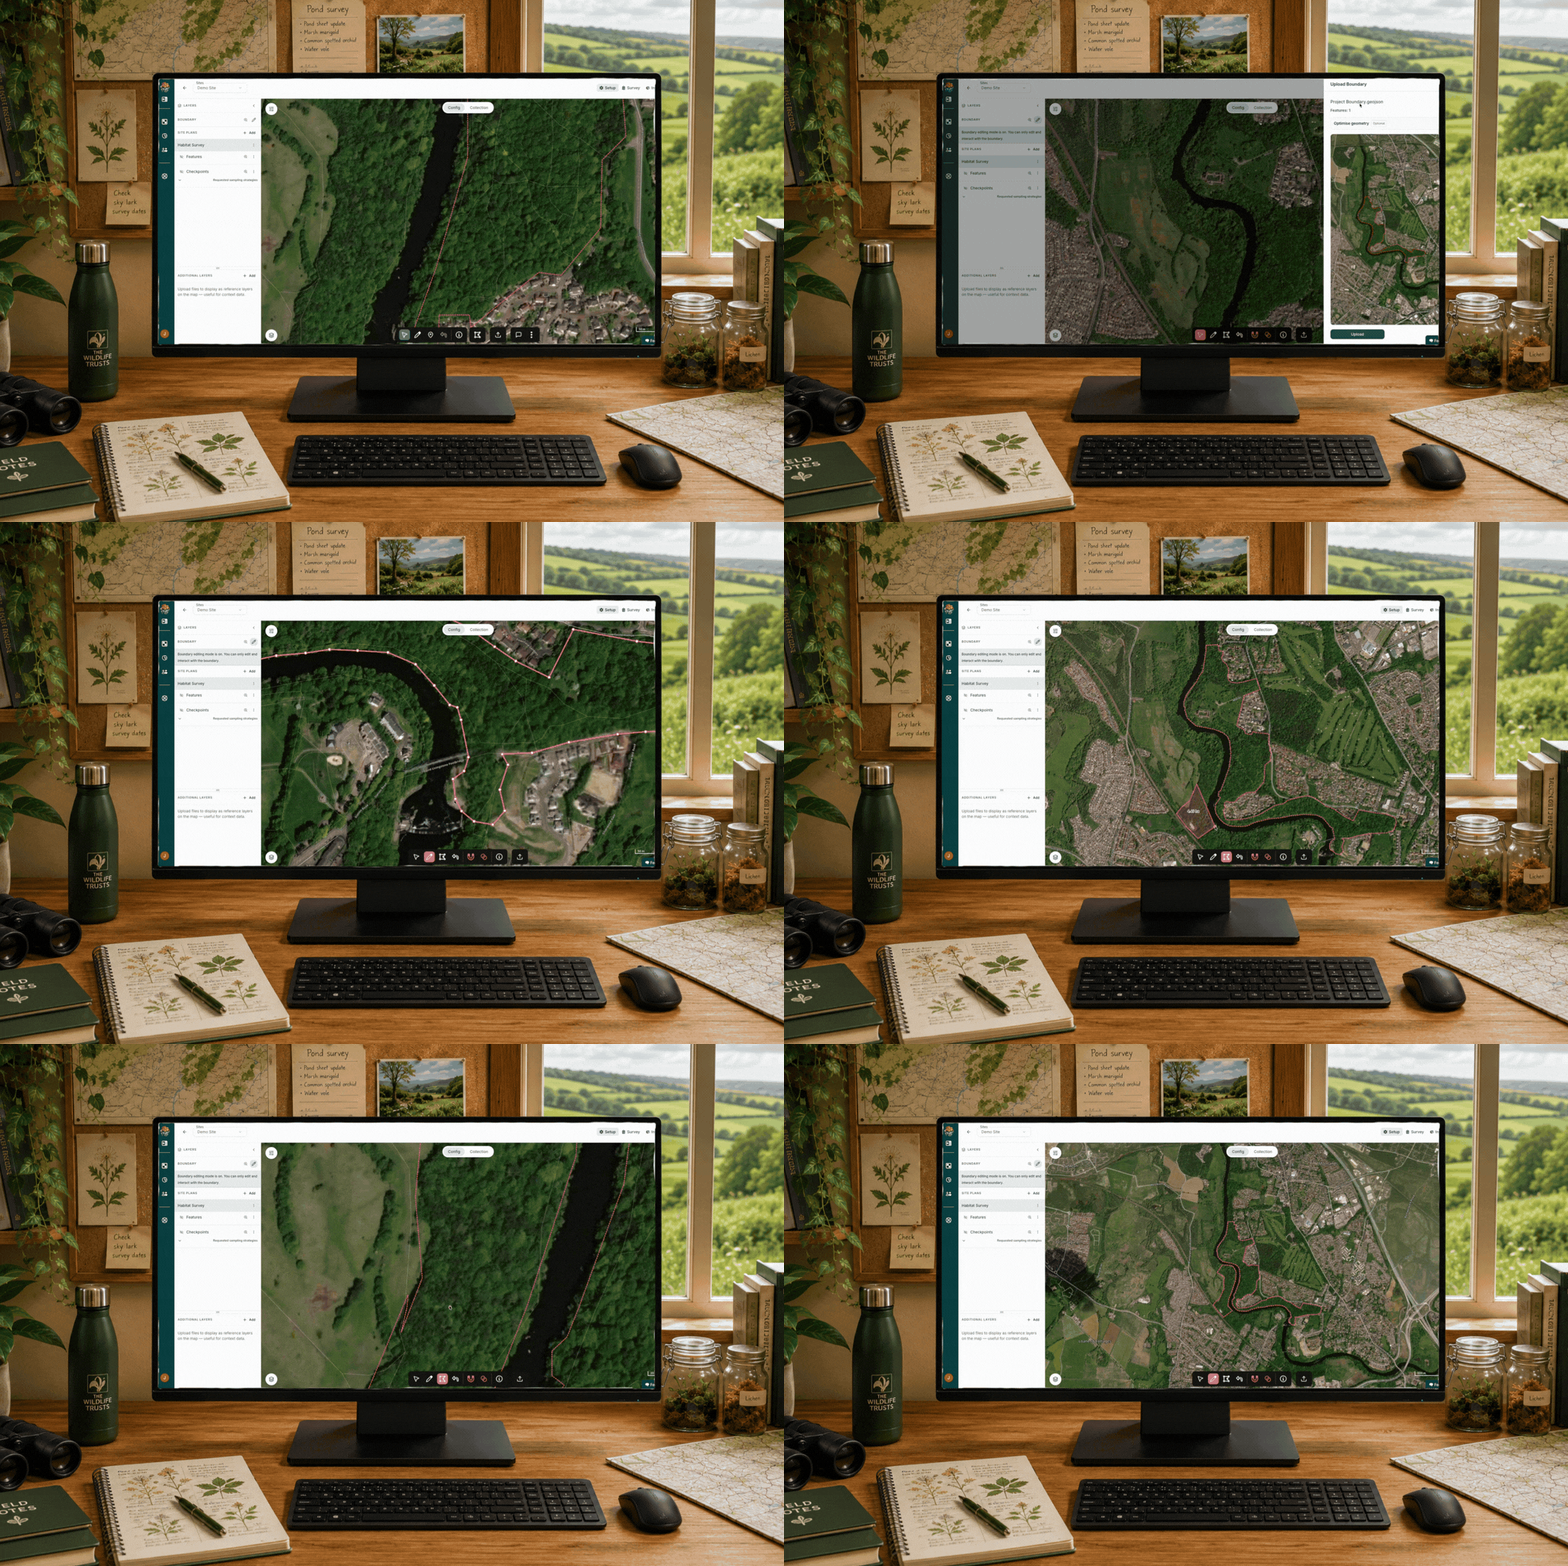
How to edit your project boundary
\